By Tashina Tappin
Staff Writer
Supplies:
Cotton balls or pom-poms Scissors

Yarn
Paper
Glue or tape
Fabric
Curtain rod Iron(optional)
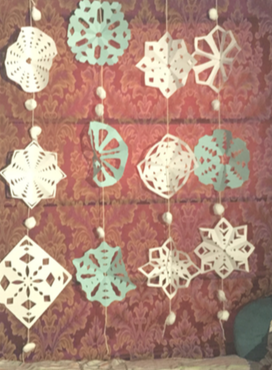
First, fold paper into triangles and cut small shapes into the edges. Take a piece of paper, fold the top edge to meet the opposite corner equally to form a square. Open the square and fold it into a rectangular shape. Then, find the bottom edge and fold one side over from the center. Repeat on the other side and fold over the matching edges. Cut off excess paper at the top of the triangle. Follow the design of your chosen template or cut out shapes of your own to make your own design. To make smaller snowflakes, either use a smaller sheet of paper, or cut a smaller triangle before making a design. You can find template designs on www.pinterest.com. Unfold the page to reveal the finished snowflake.
Once you have cut out all your snowflakes, press out creases with a low-cool iron (Disclaimer: Keep iron setting low as to not create any re hazards). On more intricate snow akes, place a piece of fabric over the snowflake as to not damage it.
Next, tie three to four pieces of string along the curtain rod depending on the size of your window. Make sure they are evenly spaced. Cut each piece of string to match the length of your window. Use either glue or tape, attach a pom-pom or cotton ball every four inches for added decoration. Glue or tape the snowflakes evenly along the string.
Lastly, spread the pieces across the window so that the snowflakes are centered. Add as many as you want to fill up your window. Vary the colors of string and paper as you wish.
With these curtains, you’ll be prepared for the winter holidays.


Be First to Comment