
By Kyhara Jeanty
Staff Writer
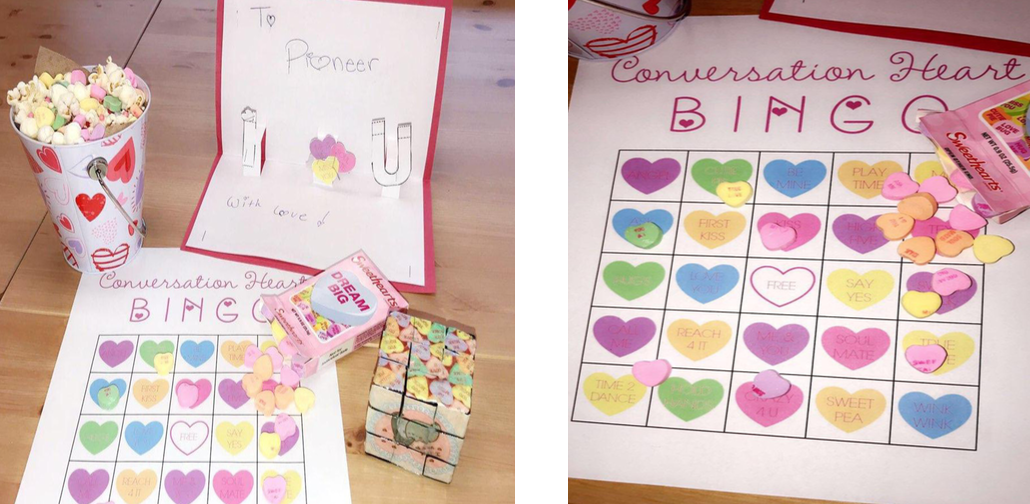
Valentine’s Day can get pretty expensive. Here are some affordable ideas to make your special someone happy on a budget. The best thing to do if you’re not trying to break the bank is a DIY project.
Project 1: “I-Heart-U” Pop-Up Card
What you need:
3 sheets of di erent colored paper scissors
glue
a pencil
Directions:
Take the first paper and fold it in half horizontally. This is the card. With the second sheet of paper, cut out three thin strips and fold them accordion style. Test out the spring before gluing one end on the inside of the card.
With the last sheet of paper, write out the letter “I” and a “U” and cut them out. Make sure that they fit on the inside of the card. On that same colored sheet, cut out a heart shape.
Next, glue the pieces to the other end of the zigzag strips. Test the spring, so the letters and heart pop out.
Finally, decorate the rest of the card and personalize it so it makes the perfect gift.
Project 2: Chocolate Popcorn
What you need:
Popcorn (store bought is fine) Chocolate (for melting) Sprinkles (optional)
A medium microwaveable bowl
A large mixing bowl
Directions:
In a medium sized bowl, warm up some candy melts or chocolate in a microwave for 30 second intervals, stirring between each time until it is melted and creamy. If you want to match the theme, you can mix red food dye with white chocolate to turn it pink. Regular milk or dark chocolate works as well.
Pop the popcorn. Mix the popcorn and warm melted chocolate together. For some added decoration and crunch, mix some pink and red sprinkles into the mix, and voilà. Valentine’s Day popcorn.
Project #3: V-Day 3D Photo Cube
What you need:
a Rubik’s cube
a printed photo of you and your significant other
mod podge
a ruler
a pencil
scissors
Directions:
Print six copies of the photo and cut them to the same size as the Rubik’s cube. Apply any photo filters of your choice to distinguish the sides and make them stand out.
Next, place the photo on the Rubik’s cube to trace the lines of each individual cube on the photo (trace on the back of the picture to avoid ruining the photo). Use the ruler to ensure the lines are straight. Then cut the lines that you made on the photo.
After your pieces are cut take your Rubiks cube and apply mod podge on one side of the Rubik’s cube, applying to each of the six sides as you go. One by one, take the pieces of the picture and place them on the Rubik’s cube. Repeat the same process on the other five sides.
Once the mod podge has dried completely, apply another thin layer of mod podge on all six sides. Let it dry completely and evenly.


Be First to Comment